Bulk Add Relation
Overview
The Bulk Add/Update Relations interface is designed to streamline the process of managing relationships between multiple systems within an organization or platform. Instead of manually linking systems one by one, this tool allows users to select a group of systems in bulk and define how they are related - all in a single operation.
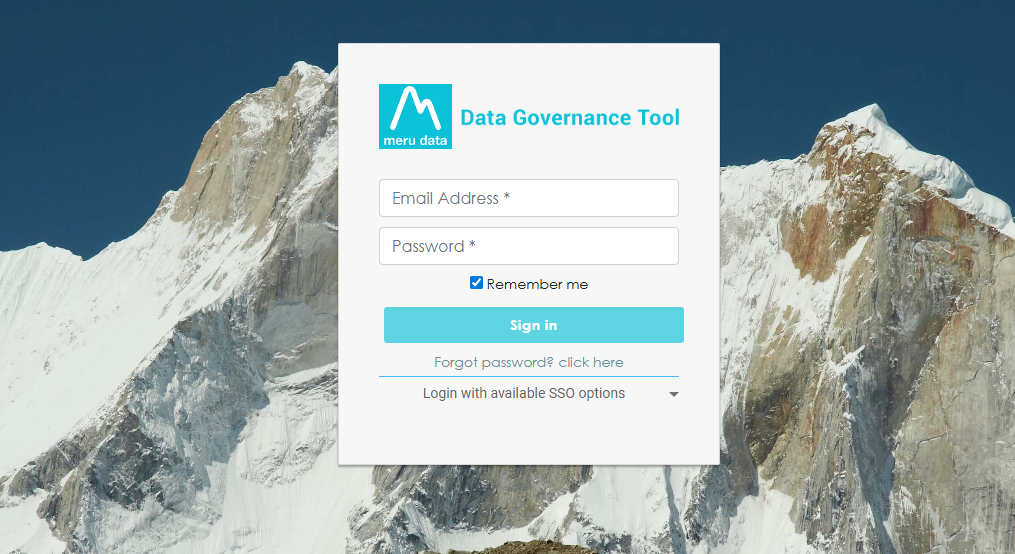
1. Logging In
Login to the Data Governance Tool by entering your credentials.
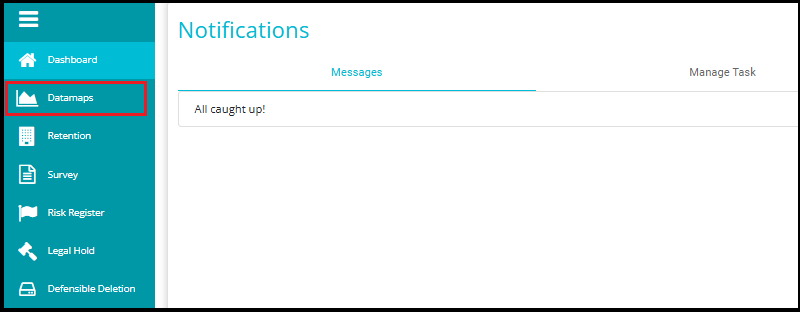
2. Navigating to Datamap Module
Click on the hamburger icon
 on the top left corner.
 Click on 'Datamap module' from the menu.
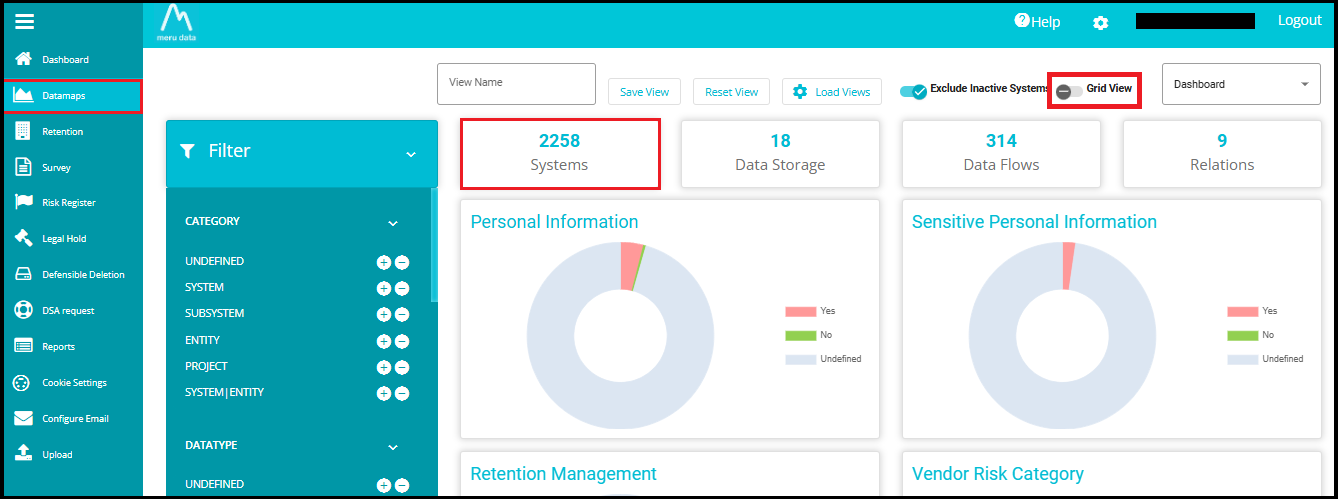
3. Navigating to Grid View
Click the "Grid View" toggle to switch from the current view to the grid layout.
Or simply click on "Systems", which will directly take you to the same Grid View layout.
4. Select Systems to Create or Update Relations
Use checkboxes or multi-select options to choose the systems you want to relate to.
You can select multiple systems at once for bulk operations.
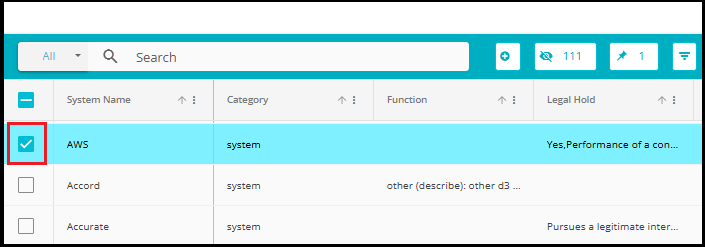
To quickly find specific systems, use the search bar at the top of the Systems list. Just type part of the system name, and matching results will appear instantly.
This feature is especially helpful when dealing with many systems, ensuring accuracy and saving time.

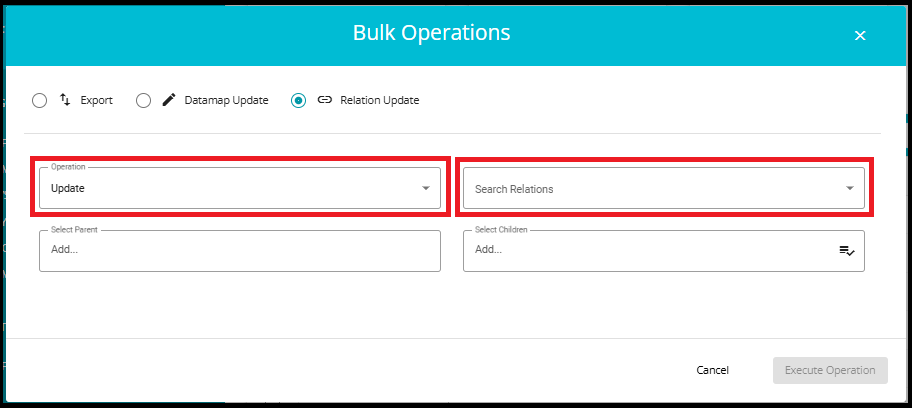
5. Open Bulk Operations
- After selecting systems, click on the Bulk Operations option.
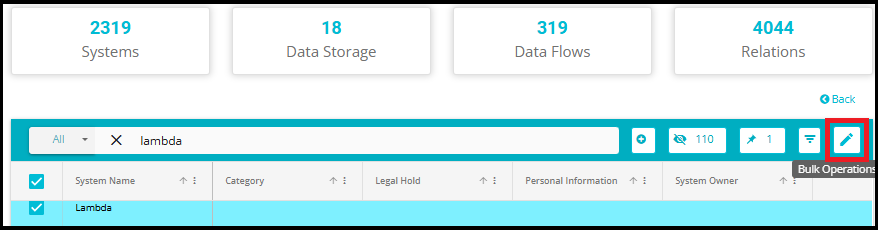
A pop‑up window will appear with multiple operation types.
Select the Relation Update option.
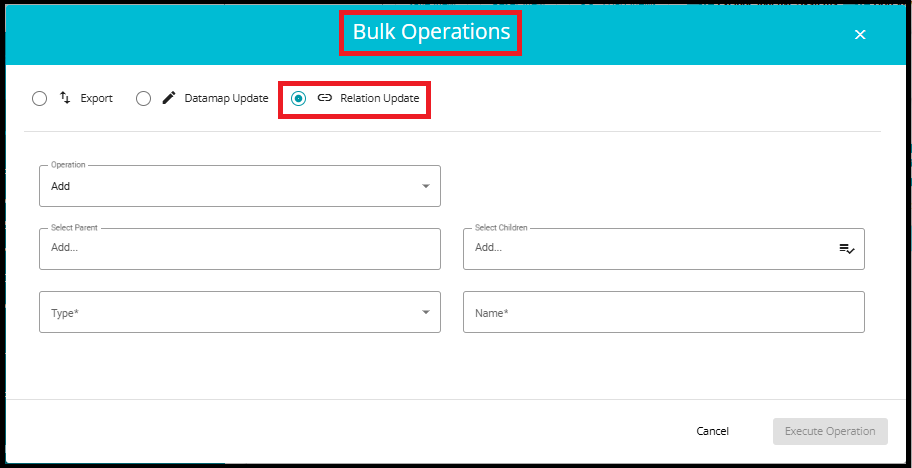
6. Fill in Relation Details
- Operation: Choose Add to create a new relation or update to modify an existing one.
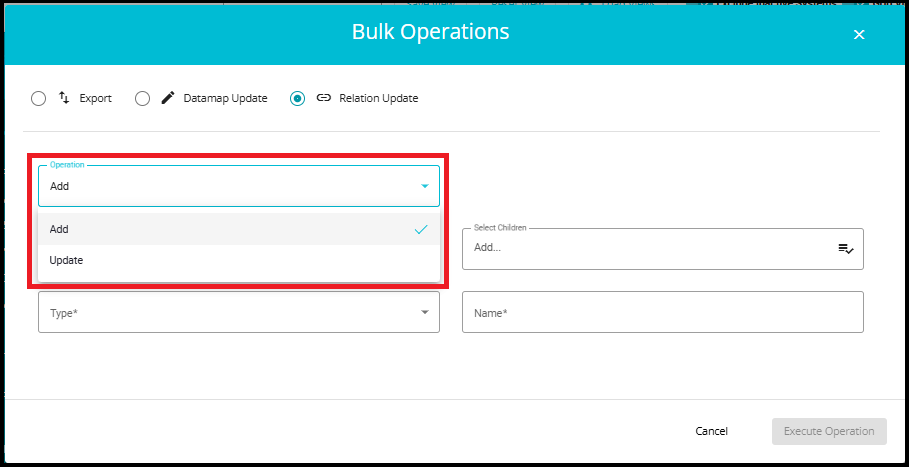
When "Add" is selected:
You see fields for:
Parent (e.g., AWS)
Children (e.g., Lambda, S3)
Type
Name
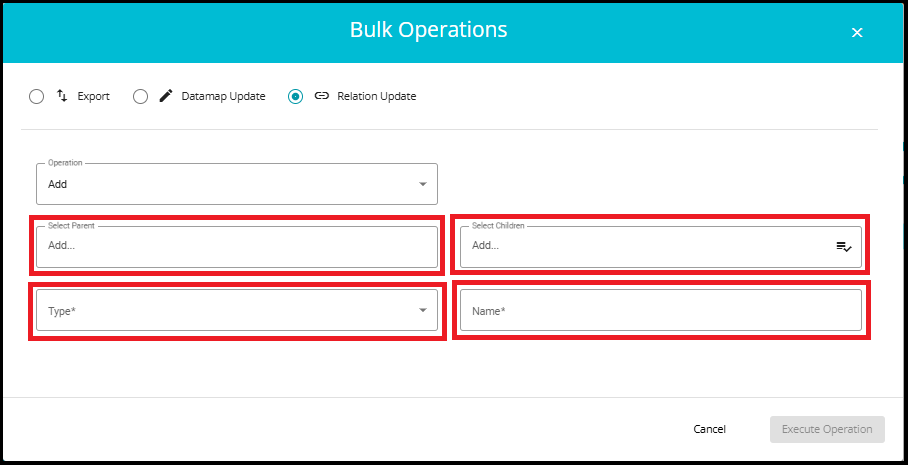
Parent: Choose the main system (e.g., AWS).
Children: Select the systems to be linked as children (e.g., Lambda, S3).
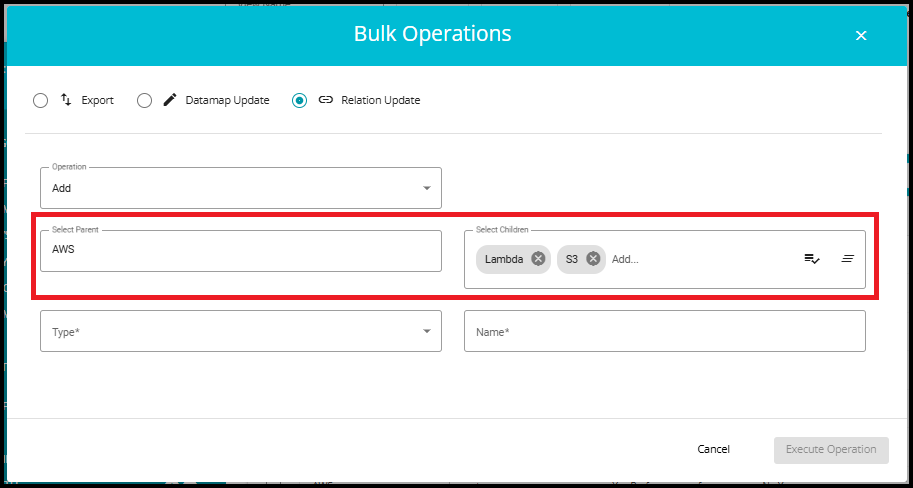
- To select all systems as children, click the Select All icon.

- To unselect all systems at once, click the Clear All icon.

- Type: Select the type of relation (e.g., Parent Child, Website Cookies, etc.).
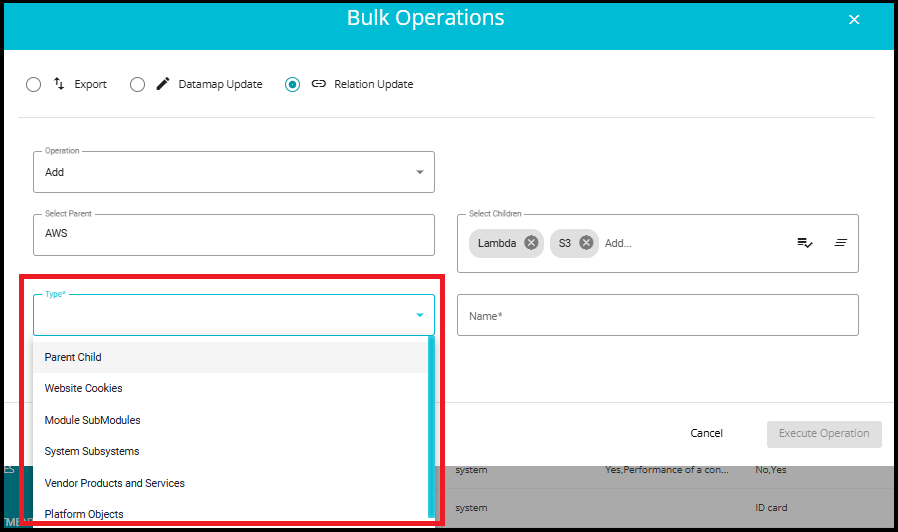
1. Parent - Child
Represents a hierarchical relationship where one system (parent) oversees or contains another (child).
For example, a cloud platform like AWS (parent) might have services like EC2, S3, Lambda (children).
Helps organize systems into logical structures for easier management and reporting.
2. Website Cookies
Links a website system to the cookies it uses.
A system representing a website (e.g., example.com) might be related to cookies like session_id, user_pref, etc.
Useful for privacy compliance, cookie tracking, and understanding data flow.
3. Module - Submodules
Indicates that a system is composed of modules and submodules.
A software system like ERP might have modules like Finance, HR, and each module might have submodules like Payroll, Recruitment.
Helps in modular architecture mapping and dependency tracking.
4. System - Subsystems
Shows that a system contains smaller subsystems that perform specific functions.
A Manufacturing System might have subsystems like Inventory Management, Production Planning, etc.
Useful for technical documentation and system design.
5. Vendor Products and Services
Connects vendors to the products or services they offer.
A vendor like Microsoft might be linked to products like Azure, Office 365, and services like Cloud Hosting.
Helps in vendor management, procurement, and service tracking.
6. Platform Objects
Relates to a platform to the objects or entities it manages or interacts with.
A platform like Salesforce might be linked to objects like Leads, Accounts, Opportunities.
Useful for CRM, data modeling, and integration mapping.
7. Dashboard Charts
Links systems or data sources to visual dashboard elements like charts and graphs.
A system that collects performance metrics might be linked to dashboard charts showing CPU usage, response time, or error rates.
Enables dynamic visualization of system data for monitoring, reporting, and decision-making.
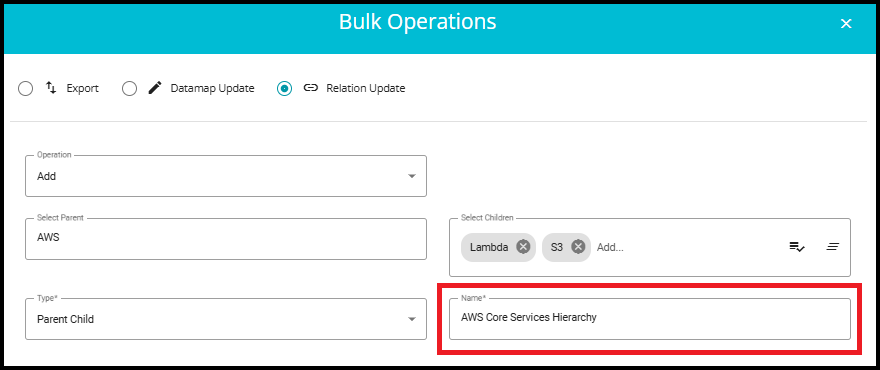
Name: Provide a custom name for the relationship being created.
Make sure the name is unique and not previously used, as it helps in identifying and managing the relation distinctly.
The Name and Type fields will be displayed only when the Add operation is selected.
When "Update" is selected:
The Type and Name fields are hidden.
A new field appears: Search for Relations, where you can select an existing relation.
7.Click on the Execute Operation button to apply the relation changes for selected systems.
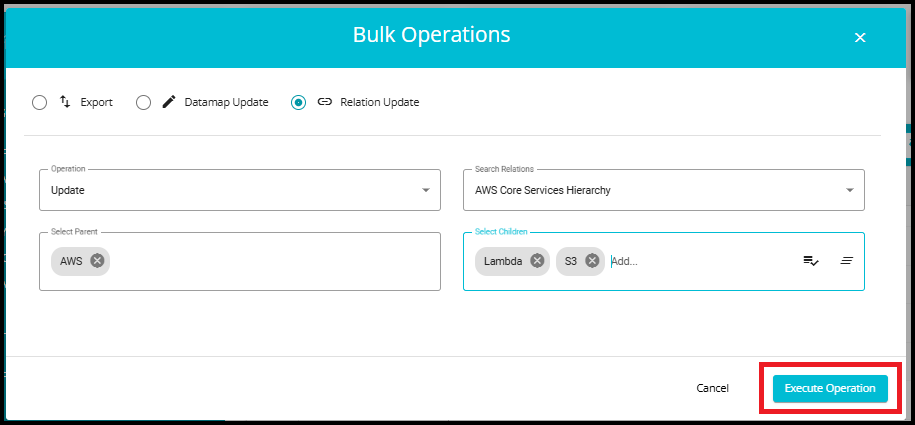
- After clicking Execute Operation, a confirmation message will appear at the bottom of the page: "Request Queued Successfully, you will be notified shortly."

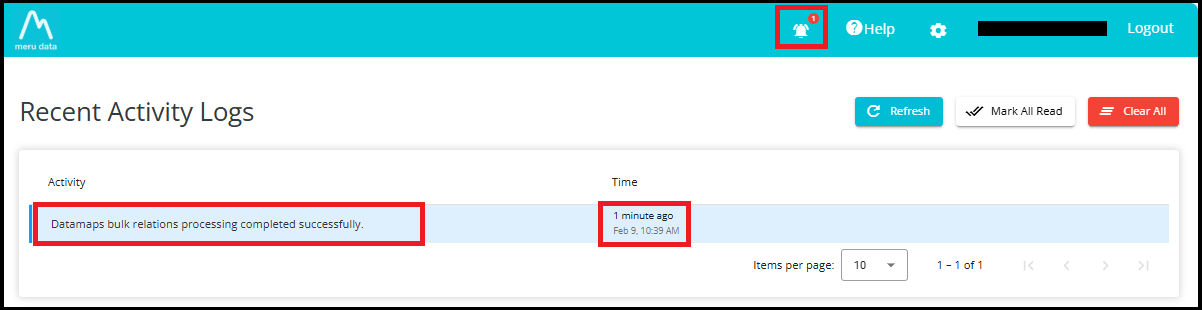
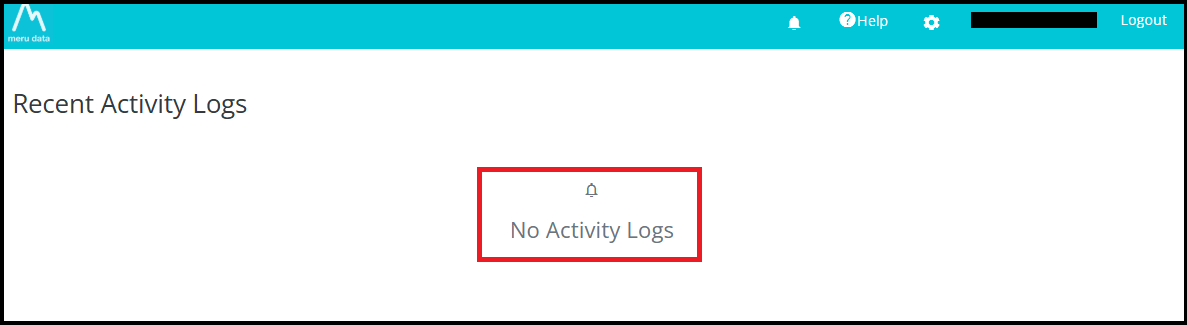
8. Click on "Activity Logs"
Once the relation update request is queued, you will receive a notification in the Activity Logs section.
A red indicator with a number inside it, appears on the notification bell icon at the top of the screen, showing that a new activity update is available.

When you click on the Activity Logs (notification bell) icon:
A log entry appears showing the message: "Datamaps bulk relations processing completed successfully."
The Time column shows exactly when your bulk relation update was completed.
The Activity Logs page provides three important control buttons---Refresh, Mark All Read, and Clear All---to help you manage your notifications efficiently.
1. Refresh
The Refresh button reloads the Activity Logs list.
Use this when:
You have recently performed an operation (like bulk relation update)
You want to check if a new log entry has arrived
You want to ensure the latest status is displayed without leaving the page
Example: If your bulk update is still processing, clicking Refresh may show a new entry such as "Datamaps bulk relations processing completed successfully."
2. Mark All Read
The Mark All Read button changes the status of all notifications from Unread to Read.
Unread notifications normally show a red indicator on the bell icon
After clicking Mark All Read, the indicator disappears
This helps you keep track of which updates you have already reviewed
Example: If the bell icon shows 1 new notification, clicking Mark All Read will remove the red badge, indicating there are no pending unread messages.
3. Clear All
The Clear All button deletes all activity log entries from the list.
Use this when you want to clean up old notifications
It removes every log entry displayed on the Activity Logs page
Be cautious---this action cannot be undone
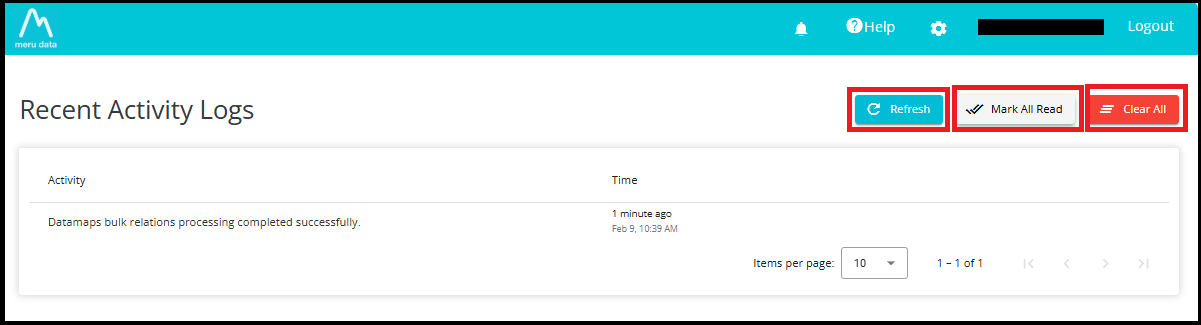
Example: If your list shows older entries like multiple "processing completed successfully" logs, clicking Clear All will wipe the entire history, leaving the page empty.
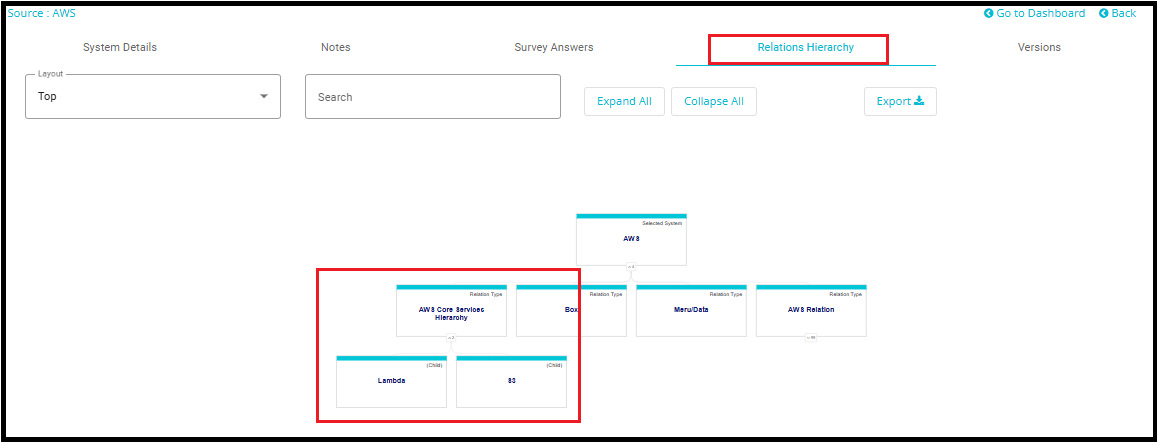
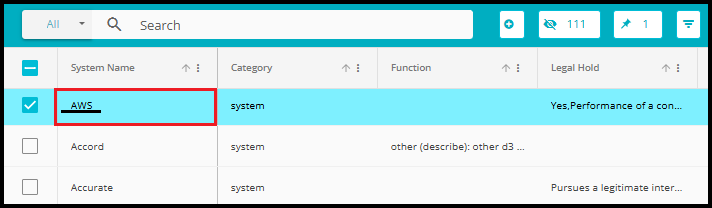
9. Viewing a Created Relation
To view the relation, you created (e.g., AWS Core Hierarchy Services):
Click on the System Name
- In the Systems tab, locate and click on the system name (e.g., AWS) that was used as the Parent in your relation.
Navigate to the System Details Tab
- This action will take you to the System Details view, where detailed information about the selected system is displayed.
Locate the "Relation" Field
Within the System Details tab, find the field labeled Relation.
This field will show the name of the relation you previously created (e.g., AWS Core Services Hierarchy).
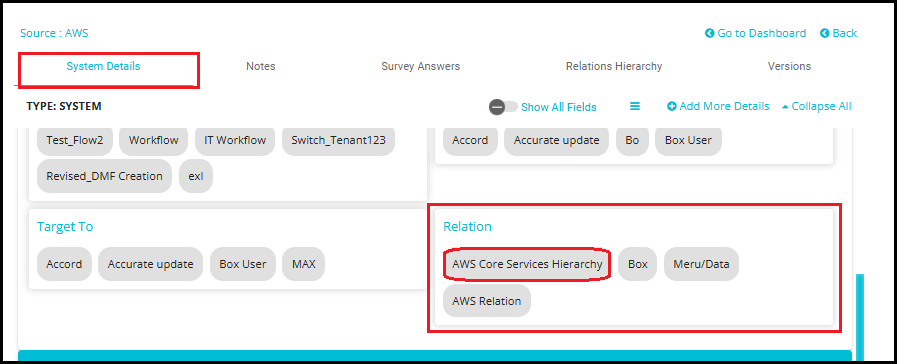
Click on the Relation Name
Clicking on the relation's name will open a view showing the Child systems linked to the parent.
In this case, you'll see systems like S3, and Lambda listed as children of AWS.

- You can also view the created or updated relation in the form of a graph by navigating the Relations Hierarchy tab.